How to setup Google IoT core with BigQuery and an IoT sensor
by bernt & torsten
In this how-to, I will show you how to set up an IoT sensor connects it to the Google Cloud Platform IoT core send the data to Google Cloud Pub/Sub. Then code a cloud function, that will wait for a pub/sub trigger and store the data in BigQuery and Firebase. This how-to if you go through it and you have the hardware that is required should take about 4 hours to complete.
Requirements
To go through this how-to on setting up a sensor you would need a few things to buy to complete this how-to. You would need the following:
- Google Cloud Platform Account
- Adafruit HUZZAH32 – ESP32 Feather Board
- DHT22 Temperature-humidity Sensor
Node.js
To run the weather cloud function – you would need to have node.js installed on your computer.
Install Node.js and npm if they are not already on your machine, Installing Node.js also installs npm. Verify that you are running at least Node.js version 8.x or greater and npm version 5.x or greater by running
node -vand
npm -vin a terminal/console window.
The Firebase Command Line Tools require Node.JS and npm.
Once Node and NPM are installed, run the following command to install Firebase CLI.
npm install -g firebase-toolsAngular
To set up to run the Web App on Firebase hosting, you would need to install Angular to your Node.js, Angular Quickstart
IoT Sensor
For this session, the IoT device used is an Adafruit HUZZAH32 – ESP32 Feather Board with a DHT22 temperature-humidity Sensor
You can buy each component individually
Adafruit HUZZAH32 – ESP32 Feather Board
DHT22 Temperature-humidity Sensor
or a full kit with other sensors
Mongoose OS & Google IoT Core Pack w/ Adafruit Feather HUZZAH32
Install MongooseOS command-line tools – mos
The instructions on how to install MongooseOS on your platform can be found here – https://mongoose-os.com/software.html
How to work with this tutorial
To get started with Google Cloud you can do all on the Cloud Console web interface, you can also do it with the Google command line tools, we are going to use the web interface, except for the Firebase Hosting as we would need Firebase command line tool installed.
To install the Google command-line tool follow the instructions here to download and install it.
I will include command-line tool instructions.
Source code for this tutorial
Download the skillshare-IoT-session software from Github.
PS. if you change the names of sub/pub, BigQuery data you need to update the code of the function to include the new names.
The Architecture
Here is the architecture using Cloud IoT Core on the Google Cloud Platform.

Create Pub/Sub topic to receive and send data
Now on the Cloud IoT Core side, you first should configure some components related to Cloud PubSub, one of the main components used by Cloud IoT Core. In the commands below you will do the following:
- Give permission to Cloud IoT Core to publish messages on PubSub.
- Create a Topic named weather-topic, where those messages will be published.
- Create a Subscriptions named weather-subscription, that we will later use to read some messages from the Topic.

# Add permissions for IoT Core
gcloud projects add-iam-policy-binding YOUR_PROJECT_NAME --member=serviceAccount:[email protected] --role=roles/pubsub.publisher# Create Pub/Sub topic for device data:
gcloud beta pubsub topics create <topic_name># Create Pub/Sub subscription for device data:
gcloud beta pubsub subscriptions create --topic <topic_name> <topic_subscription_name>Create a Cloud IoT Core registry of devices
Google Cloud IoT Core, is a managed service to securely communicate with your IoT devices using common protocols (MQTT and HTTP) and to manage those devices in an easy way.
Basically, with this service, you can plug with many other Google services to process, store and analyze all the data generated by your devices.
Cloud IoT Core has a concept of registry of devices, wherein our project we will group a series of similar devices and associate with this registry.
- Log in to the following project: <project name>
Open up the Google IoT Core

Create a Registry named weather-station-registry, where our devices will be registered to be able to connect to Cloud IoT Core. Here we associate with the Topic created.
Google Cloud Platform IoT overview

Click Create
# Create device registry:
gcloud beta iot registries create <registry_name> --region <region_name> --event-pubsub-topic=<pub/sub_topic_name>Program the ESP8266 using the mos
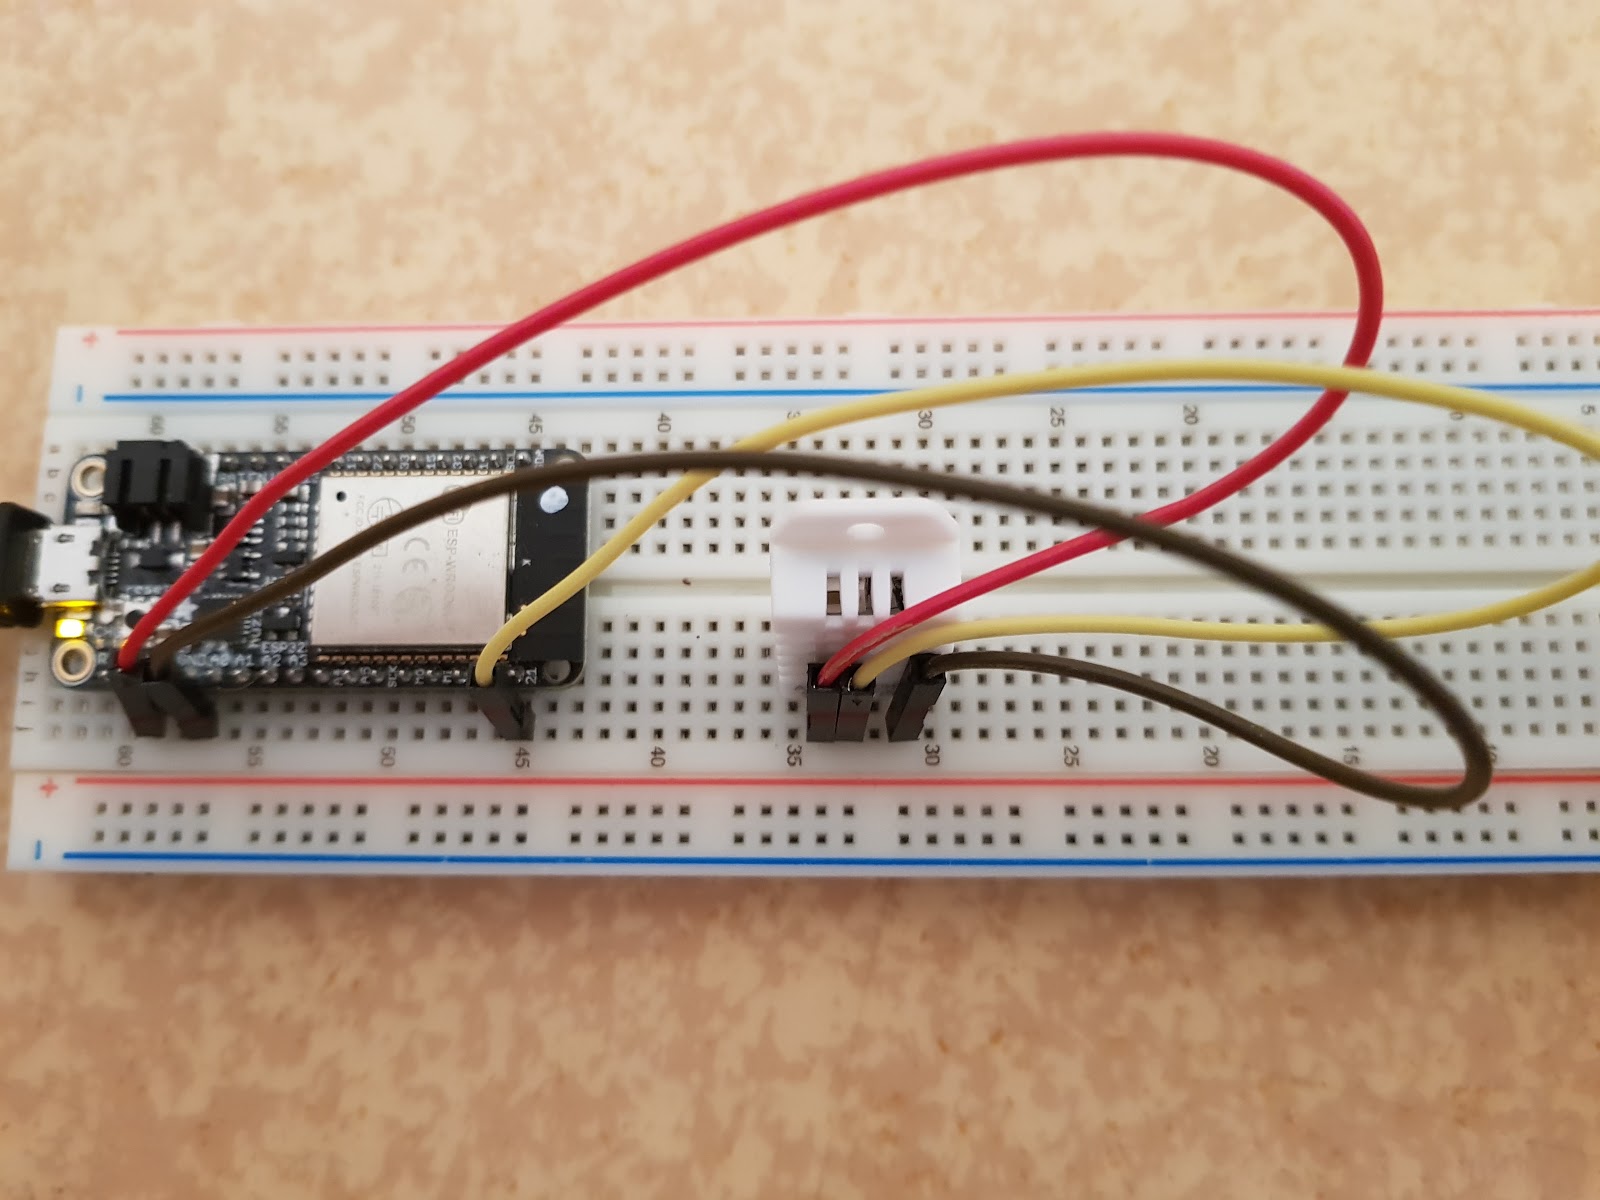
The circuit for this project is very simple, just connect the DHT sensor to the ESP8266 like the following diagram:


Pin 3v, GND and Pin 21 on the ESP8266 connect to DHT sensor Simply connect the first DHT pin on the left to 3-5V power, the second DHT pin to your data input pin and the rightmost DHT pin to ground.
To program the board we will use MongooseOS, with MongooseOS you can quickly prototype your embedded apps using Javascript and it has tools called mos that make programming, provisioning and configuration really easy.
Install mos and start mos from the command line, make sure your Adafruit HUZZAH32 – ESP32 Feather Board is set up and connected to your laptop with the USB cable.
We are going to use the MongooseOS console to setup the code we want to use with the DHT sensor. Start the mos console.

To program the hardware, select the “device files” from the right hand menu bar and in the list of files select init.js

- Copy the code from the Github repository folder – weather-mongoseOS-firmware-code and paste it in over the current code in init.js
- Then click Save and reboot on the mos console
- Run the following command to register this device on Cloud IoT Code. The command generates a public and a private key to be used for the communication, put the private key on the device, send the public key to Cloud IoT Core and register the device, getting the deviceId from ESP.
mos gcp-iot-setup --gcp-project YOUR_PROJECT_NAME --gcp-region us-central1 --gcp-registry YOUR_REGISTRYOn the mos console device logs, you should start seeing activities.
To see the data on Pub/Sub you can use gcloud command to query the subscription that we created:
$ gcloud beta pubsub subscriptions pull --auto-ack telemetry-subscriptionFirebase to receive the data
Introducing Firebase https://console.firebase.google.com/
## Create a Firebase account & project
If you haven’t already, open up a Firebase account, go to the Firebase console and start a new project for your app.
## Install the Firebase command line tools
Install the Firebase CLI with the following command:
$ ‘npm install -g firebase-tools’## Login using the Firebase CLI & initialize your project
Login to your Firebase account with the following command:
$ ‘firebase login’Then initialize the project using this command:
‘$ firebase init’Upon initializing the project you’ll be asked a few questions:
Firebase CLI features…: Hosting.
Database rules file: You can keep the default file name that they provide, or change it if you prefer. This file will be created and will contain the database rules for your app.
Public directory: Type in dist, because this is where your production-ready Angular app assets are.
Configure as a single-page app: Most of the time you’ll say yes (y) for this one.
Overwrite index.html: No.
## Deploy to Firebase Hosting
Use this command to deploy your production-ready app to Firebase Hosting:
$ ‘firebase deploy --only hosting’Deploy a Firebase Cloud Functions to ingest the data
Now to insert data on BigQuery we will use Firebase Cloud Functions, that can be configured to execute based on many different triggers and events.
One of those triggers is new data inserted on a PubSub Topic, so we will listen to our Topic associated with our Device Registry and with each data that arrives we execute a function that stores the data in BigQuery and maintain the last device data on Firebase Realtime Database.
Firebase Realtime Database is technology really useful to maintain real-time data, giving free and automagically sync between all connected clients being web or mobile.
The code for our Cloud function which you find in the Github repository skillshare-IoT-session->cloud-function-iotWeather->functions->index.js, reacts to a Pub/Sub events and insert the data into BigQuery and then update the current state on Firebase.
Now to configure firebase with our project and deploy the functions, in the project root folder, follow the above instructions:
- Run firebase login to authenticate with Google and set up the command line tools
- Run firebase init to associate the local project with your Firebase Project.
- Run the above code to set some environment variables, pointing to our BigQuery dataset and table.
firebase functions:config:set bigquery.datasetname=”<your-dataset_name>” bigquery.tablename="<your_table_name>”And finally, run
firebase deploy --only functions:<the_functions_name>if you don’t use –only functions and specify the name, the functions that you already have will be deleted.
From the repository use the folder cloud-functions-iotWeather
Deploy a basic WebApp in Firebase Hosting
With your command-line tool, got to the folder firebase-hosting-tempcharts in the location where you stored the Github skillshare-IoT-session
cd skillshare-IoT-session/firebase-hosting-tempchartsIn the directory run the command
npm installIt installs all the dependency for node.js for the project
You can now test it either with the command
ng serveor
firebase serveIf you have your firebase project setup you can now deploy the code to the Firebase Hosting with the command.
firebase deploy --only hostingFor the web app to work a Google Cloud Function has to be deployed that reads the data from, in the Github repository – the folder reportData contains the code to upload to the firebase function. The reportData code will query the BigQuery database for the last 7 days of weather sensor data and present it to the web app as a JSON string.
In the directory, reportData run the command
npm installAnd then run
firebase deploy --only functions:<the_functions_name>Setup BigQuery receive data
We will use BigQuery to store all of ours collected sensor data to run some queries and to build reports later using Data Studio.
To start let’s create a Dataset and a Table store our data. To do this, open the BigQuery Web UI, and follow the instructions:
- Click on “Create new dataset”.
- Name you Dataset – I suggest you call it – “weather_iot_data”.
- Create a Table “raw_weatherIoT_data” with the following fields and types:

BigQuery Table Structure
deviceid STRING REQUIRED
timestamp TIMESTAMP REQUIRED
temp FLOAT REQUIRED
humidity FLOAT REQUIRED
free_ram FLOAT NULLABLE
total_ram FLOAT NULLABLE
That’s it – now you have a dataset and a table set up in BigQuery.
Run the following command on the command line to set some environment variables, pointing to our BigQuery dataset and table.
Please do:
firebase functions:config:set bigquery.datasetname=<datasetname> bigquery.tablename=<table_name>Make a report in BigQuery using Data Studio
First, we need to get the Data Source from which you will build the report

When you have the data, you could build a report like this.

More to read
Functions Events and Triggers – https://cloud.google.com/functions/docs/concepts/events-triggers

Tech Disillusionment
For four decades, I have worked in the tech industry. I started in the 1980s when computing...

A Poem: The Consultant's Message
On a Friday, cold and gray,
The message came, sharp as steel,
Not from those we...

Using AI to Plan Wall Repair and Gutter Installation
In this article, I will share my experience using AI to plan the work required to fix a wall...